
Install php 8.2, mysql, apache, phpmyadmin on ubuntu 22
All the new CMS and frameworks have started support for php 8.2. And it is quite easy to install php8.2 on ubuntu 22. Here is step by step guide to install php8.2 on buntu 22. Same guide should work fine for ubuntu 18, Ubuntu 20 etc.
Step 1: Install PHP8.2 from PPA
Install software-properties-common using apt command so that additional PPA can be added and installed easily
sudo apt-get install software-properties-common
First we’ll on ondrej PPA. ondrej/php has been providing us with PHP packages since ages.
sudo add-apt-repository -y ppa:ondrej/php
sudo apt update
Now you’ll be able to install php8.2 from ondrej php repository.
sudo apt install php8.2
Lets install some commonly used extensions. Thanks to ondrej/php ppa, we can now install those extensions using apt install. Here are most common extensions that are generally required by WordPress, Drupal 8, Drupal 9, Drupal 10 etc.
sudo apt-get install -y php8.2-cli php8.2-common php8.2-fpm php8.2-mysql php8.2-zip php8.2-gd php8.2-mbstring php8.2-curl php8.2-xml php8.2-bcmath
If you want to see the list of all the available php8.2 extensiosn:
apt list -a php8.2-*
Step 2: Installing apache
Simply install apache using apt:
sudo apt install apache2
You can start the apache if it is not started automatically:
sudo service apache2 start
Step 3: Installing MySql
Use apt to install MySql. On ubuntu 22/20 you’ll get mysql8.0 by default.
sudo apt install mysql-server
sudo systemctl start mysql.service
We can run security script to do a security autdit. It will ask few questions based upon which it will set security policy. This become more crucial when we are on production server. Forl local machines you can work with weak security options.
sudo mysql_secure_installation
Here we have made following choices for our local installation:
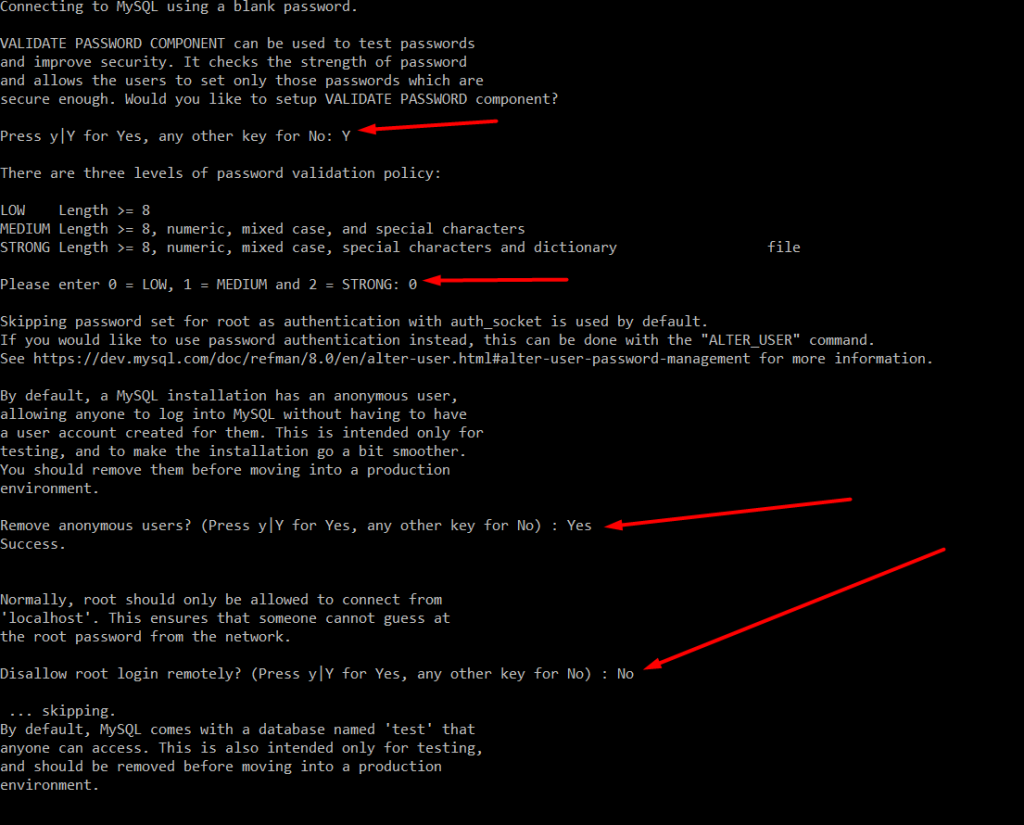
We have not yet set the MySql password. Lets set the root password.
sudo mysql;
ALTER USER 'root'@'localhost' IDENTIFIED WITH mysql_native_password BY 'password';
Now you can use your root password to connect to MySql.
Step 4: Installing phpMyAdmin
sudo apt install phpmyadmin
Use spacebar on your keyboard to check apache2 and press tab to move cursor to <Ok> button.
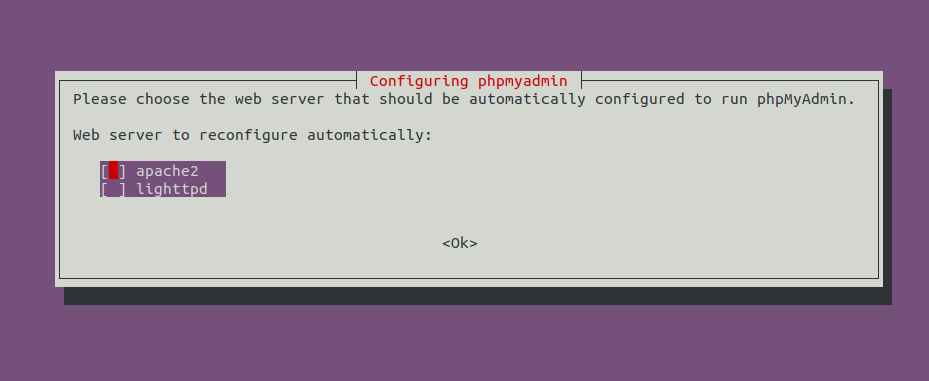
In next select you can select No (or Yes) based upon your choice. But as we have already install mysql you can press No and enter the root password.
After completing this you should be able to access phpMyAdmin at:
Now you should be able to access your phpmyadmin at
localhost/phpmyadmin

Leave a Reply
We'll try to resolve your queries asap.
Recent Posts
22.Jan.2024 | codedrill | Drupal
Drupal 7 to 10 migration services
Hire Codedrill for Drupal 7 to Drupal 10 migration. We also offer complete drupal development services from
11.Jan.2024 | codedrill | Apache, Hosting, Linux, MySQL, PHP
Install php 8.2, mysql, apache, phpmyadmin on ubuntu 22
All the new CMS and frameworks have started support for php 8.2. And it is quite easy to install php8.2 on